
Mastering the Technique: How to Wire Wrap a Faceted Gemstone Like a Pro
Share
Introduction
Wire wrapping is an intricate and rewarding art form that combines creativity and technique to create stunning jewelry pieces. Among the various elements you can work with, faceted gemstones stand out due to their brilliant cuts and captivating light refraction. Whether you’re a beginner or an experienced jewelry maker, mastering the wire wrapping technique can elevate your creations to a professional level. In this comprehensive guide, we will delve into the essential tools, techniques, and tips for wire wrapping a faceted gemstone like a pro.
Understanding Faceted Gemstones
Faceted gemstones are cut with multiple flat surfaces to enhance their brilliance and sparkle. They come in various shapes, including round, oval, cushion, and pear, and are often used in rings, necklaces, and earrings. Understanding the characteristics of the gemstone you are working with will help you choose the appropriate wire and wrapping technique.
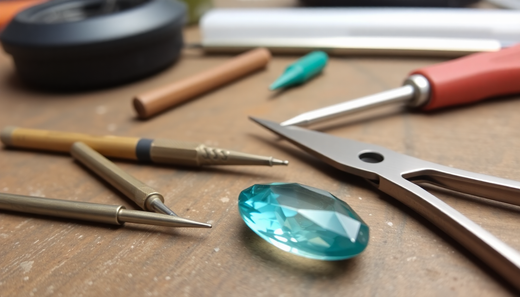
Tools and Materials Needed
To get started with wire wrapping, gather the following tools and materials:
- Quality Wire: Choose from copper, silver, or gold-filled wire. The gauge (thickness) of the wire will affect the sturdiness and flexibility of your design.
- Wire Cutters: Essential for trimming your wire to the desired lengths.
- Round-Nose Pliers: Used for creating loops and curves in your wire.
- Chain-Nose Pliers: Great for gripping and bending wire in tight spaces.
- Flat-Nose Pliers: Useful for flattening or straightening wire.
- Faceted Gemstone: Select a gemstone that inspires you. Consider its color, cut, and size.
- Beads or Additional Embellishments: Optional, but they can add unique flair to your designs.
- Jewelry Design Board or Mat: Helps keep your workspace organized and prevents your components from rolling away.
Choosing the Right Wire
The wire you choose can dramatically impact your wire wrapping projects. Consider the following factors when making your selection:
- Gauge: The gauge of the wire indicates its thickness. A lower gauge number means a thicker wire, which provides more durability, while a higher gauge number indicates a thinner wire that allows for more intricate designs. Common gauges for wire wrapping are between 20 to 26.
- Material: Copper wire is a popular choice for beginners due to its affordability and ease of manipulation. Silver and gold-filled wires offer a more luxurious finish but can be more costly. Choose according to your budget and the desired look of your finished piece.
- Color: Wire comes in various colors, including natural, oxidized, and colored coatings. Selecting a wire color that complements your gemstone can enhance the overall aesthetic.
Preparing Your Gemstone
Before diving into the wrapping process, take the time to prepare your faceted gemstone:
- Cleaning: Ensure your gemstone is clean and free from dust or oils. Use a soft cloth or a gentle soap solution to clean it, and dry it thoroughly.
- Inspecting: Examine the gemstone for any flaws or irregularities. Understanding its structure will help you determine where to place your wire and how to secure it.
Basic Wire Wrapping Technique
Now that you have your tools and materials ready, let’s walk through the basic wire wrapping technique step-by-step:
- Cut the Wire: Start by cutting a piece of wire approximately 24 to 30 inches long. The length of the wire depends on the complexity of your design.
- Create a Loop: Using your round-nose pliers, make a small loop at one end of the wire. This loop will act as the anchor for your gemstone.
- Position the Gemstone: Place the faceted gemstone against the loop, ensuring it sits securely. Make sure the facets are facing outward, as this will allow maximum light reflection.
- Wrap the Wire: Start wrapping the wire around the gemstone. Use your chain-nose pliers to guide the wire and ensure it wraps securely around multiple facets. For stability, wrap the wire around the gemstone at least 3-4 times.
- Securing the Wrap: Once you’re satisfied with the number of wraps, create another small loop at the top of the gemstone to secure the end of the wire. You can also add beads at this stage for additional decoration.
- Trim Excess Wire: Use your wire cutters to trim any excess wire, leaving a small tail that can be tucked in or wrapped around the existing wire for a neat finish.
- Final Adjustments: Use your pliers to adjust and refine the shape of your wrapped gemstone, ensuring everything is secure and visually appealing.
Advanced Wire Wrapping Techniques
Once you’ve mastered the basic technique, consider experimenting with advanced wire wrapping methods to create more intricate designs:
- Double Wire Wrapping: Use two strands of wire to create a thicker and more robust design. This technique allows for more creative wrapping styles.
- Bezel Setting: Create a bezel to encase the gemstone completely. This requires more skill but results in a polished and professional look.
- Adding Beads: Incorporate beads in your wire wrap for added texture and color. This can be done at various points in the wrapping process.
- Creating a Pendant or Necklace: Extend your wire wrapping techniques to create entire pieces, such as pendants or necklaces, that feature multiple gemstones and decorative elements.
Tips for a Professional Finish
Here are some additional tips to ensure your wire wrapping projects have a polished, professional look:
- Experiment with Different Designs: Don’t be afraid to try new techniques or designs. Practice will help you develop your unique style.
- Use High-Quality Materials: Investing in quality gemstones and wire will yield better results and enhance the durability of your jewelry.
- Work Slowly and Carefully: Take your time during the wrapping process to avoid mistakes. Rushing can lead to uneven wraps or damage to the gemstone.
- Practice Consistency: Aim for uniformity in your wraps and loops. This will create a more cohesive and professional-looking design.
- Finish Edges Neatly: Tuck in and secure any loose ends to prevent them from catching on clothing or skin.
Conclusion
Mastering the technique of wire wrapping a faceted gemstone is a rewarding endeavor that opens up endless possibilities for creativity in jewelry making. With practice and patience, you can create stunning pieces that showcase the unique beauty of each gemstone. Start with the basic techniques outlined in this guide, and as you grow more confident, explore advanced methods to further enhance your skills. Let your creativity shine as you transform beautiful gemstones into wearable art!